
Hey there! As a supplier in the sheet metal fabrication business, I've seen firsthand how crucial it is to install fasteners correctly in sheet metal parts. It's not just about making things stick together; it's about ensuring the structural integrity, functionality, and longevity of the final product. In this blog, I'll share some tips and tricks on how to install fasteners in sheet metal parts the right way.
Understanding Sheet Metal and Fasteners
First off, let's talk a bit about sheet metal. Sheet metal comes in various materials like brass, copper, aluminum, and steel. Each material has its own properties, which can affect how you install fasteners. For instance, brass and copper are relatively soft metals, while steel is much harder. You can check out more about Brass and Copper Sheet Metal Fabrication, Aluminum Sheet Metal Fabrication, and Steel Sheet Metal Fabrication on our website.
Fasteners, on the other hand, are used to join two or more parts together. There are different types of fasteners, such as screws, nuts, bolts, rivets, and weld studs. The choice of fastener depends on several factors, including the type of sheet metal, the load requirements, and the assembly process.
Pre-Installation Preparation
Before you start installing fasteners, it's important to do some preparation work. Here are the steps you should follow:
1. Design Considerations
- Select the Right Fastener: Based on the application, choose the appropriate type, size, and material of the fastener. For example, if you need a high-strength connection, a bolt and nut might be a better choice than a screw.
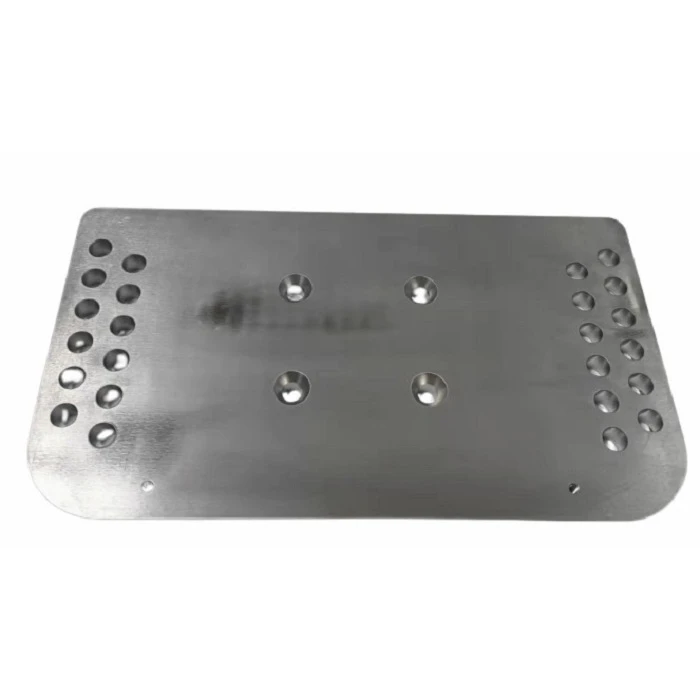
- Determine Hole Sizes: The hole size in the sheet metal should match the fastener size. If the hole is too small, the fastener may not fit properly or could damage the sheet metal. If the hole is too large, the fastener may not provide a secure connection.
- Plan the Layout: Decide where the fasteners will be placed on the sheet metal. Make sure they are evenly spaced and located in areas that can withstand the expected loads.
2. Material Inspection
- Check the Sheet Metal: Inspect the sheet metal for any defects, such as cracks, dents, or scratches. These defects can weaken the sheet metal and affect the performance of the fasteners.
- Inspect the Fasteners: Examine the fasteners for any damage or defects. Make sure they are clean and free of debris.
3. Surface Preparation
- Clean the Sheet Metal: Remove any dirt, oil, or grease from the surface of the sheet metal. This will ensure a good bond between the fastener and the sheet metal.
- Deburr the Holes: Use a deburring tool to remove any sharp edges or burrs from the holes in the sheet metal. This will prevent the fasteners from getting damaged during installation.
Installation Techniques
Now that you've done the preparation work, it's time to install the fasteners. Here are some common installation techniques for different types of fasteners:

1. Screws
- Drill Pilot Holes: If the sheet metal is thick or hard, it's a good idea to drill a pilot hole before inserting the screw. The pilot hole should be slightly smaller than the screw diameter.
- Use the Right Driver: Select a screwdriver that fits the screw head properly. Using the wrong driver can damage the screw head and make it difficult to install or remove the screw.
- Apply the Right Torque: Tighten the screw to the recommended torque value. Over-tightening can strip the threads or damage the sheet metal, while under-tightening can result in a loose connection.
2. Nuts and Bolts
- Insert the Bolt: Pass the bolt through the holes in the sheet metal parts. Make sure the bolt is aligned properly.
- Add the Nut: Place the nut on the end of the bolt and start tightening it using a wrench. Use a socket wrench for a more secure grip.
- Check the Torque: As with screws, it's important to apply the right torque when tightening the nut. You can use a torque wrench to ensure accuracy.
3. Rivets
- Select the Right Rivet: Choose a rivet that is the appropriate size and material for the application. The rivet should be able to fill the hole in the sheet metal and provide a strong connection.
- Insert the Rivet: Place the rivet in the hole and use a rivet gun to set it. The rivet gun will deform the end of the rivet, creating a secure connection.
- Inspect the Rivet: After setting the rivet, check to make sure it is properly installed. The rivet should be flush with the surface of the sheet metal and not loose.
4. Weld Studs
- Prepare the Welding Equipment: Set up the welding equipment according to the manufacturer's instructions. Make sure the welding current and time are set correctly.
- Position the Stud: Place the weld stud on the sheet metal at the desired location. Make sure it is perpendicular to the surface.
- Weld the Stud: Activate the welding equipment to weld the stud to the sheet metal. Hold the stud in place until the weld has cooled.
- Inspect the Weld: Check the weld for any signs of defects, such as cracks or porosity. A good weld should be strong and secure.
Post-Installation Checks
After installing the fasteners, it's important to perform some post-installation checks to ensure everything is in order. Here are the steps you should take:
1. Visual Inspection
- Check the Fasteners: Look at the fasteners to make sure they are properly installed and tightened. Check for any signs of damage or deformation.
- Inspect the Sheet Metal: Examine the sheet metal around the fasteners for any signs of damage, such as cracks or bulges.
2. Functionality Test
- Test the Assembly: If the sheet metal parts are part of an assembly, test the functionality of the assembly to make sure the fasteners are providing a secure connection.
3. Torque Verification
- Recheck the Torque: Use a torque wrench to recheck the torque of the fasteners. Make sure they are still tightened to the recommended value.
Troubleshooting
Even with proper preparation and installation techniques, you may encounter some problems during the fastener installation process. Here are some common issues and how to solve them:
1. Stripped Threads
- Cause: Stripped threads can occur if the fastener is over-tightened or if the hole size is incorrect.
- Solution: If the threads are only slightly damaged, you can try using a thread repair kit. If the damage is severe, you may need to drill a larger hole and use a larger fastener.
2. Loose Fasteners
- Cause: Loose fasteners can be caused by under-tightening, vibration, or thermal expansion and contraction.
- Solution: Tighten the fasteners to the recommended torque value. You can also use thread-locking compounds or washers to prevent the fasteners from loosening.
3. Rivet Failure
- Cause: Rivet failure can occur if the rivet is not the right size or material, or if it is not installed correctly.
- Solution: Remove the failed rivet and replace it with a new one. Make sure to follow the proper installation procedure.
Conclusion
Installing fasteners in sheet metal parts correctly is essential for the success of any sheet metal fabrication project. By following the tips and techniques outlined in this blog, you can ensure that your fasteners provide a secure, reliable, and long-lasting connection.
If you have any questions or need further assistance with sheet metal fabrication or fastener installation, feel free to reach out to us. We're here to help you with all your sheet metal needs. Whether you're looking for Brass and Copper Sheet Metal Fabrication, Aluminum Sheet Metal Fabrication, or Steel Sheet Metal Fabrication, we've got you covered. Contact us today to start your next project!
References
- "Sheet Metal Fabrication Handbook" by John Doe
- "Fastener Installation Guide" by ABC Company